Saturday, March 19, 2011

Zips, Keys and the swish of paper.

I have actually been quite busy getting some pieces ready for submission for an exhibition and thinking through ideas for another piece, but in-between I have had time for some light relief. If you want a quick fix I have two great links for you.


One is for the best tutorial I have found for putting a zip in a lined bag or purse with no fuss or problems. I used to have what I thought was a simple way but this one is definitely the best I have found and is a video which helps. It is good way to use up bits and pieces of fabric which you have experimented with and on. I made a small purse and a new pencil case. I may try and source some fancy zips; like the ones Melanie Testa uses.


That link could well send you into frenzied activity if you are anything like me and just have to do something creative straight away. So now I have a lovely contemplative break for you, that is if you love the swish and sound of books and handmade paper. Take a look at Susan Mills website, it could make you drool.


I have finally finished the hanging and added keys along the bottom. They are old family keys so it is a bit sentimental. ‘She will need help in the Persian Palaces’, I think there is a fire and her old retainer is off to find the keys to the locked tower- or something like that!


We recently visited the Victoria and Albert Museum in London, and because I was with my husband we looked in galleries that I would probably not have visited, for instance the ironwork gallery, where there is a whole display of keys from over the ages. They were really fascinating. These small keys don't give the clang that you get with larger ones; I know because we have just added some to a hanging at the day centre where I work. There has just been a survey which has, for some reason, found that most homes have a hoard of keys with long forgotten origins.

Monday, March 14, 2011

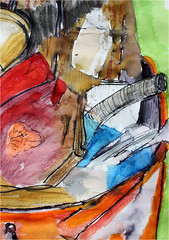
'Spilling Over' detail.

'Spilling Over' detail. by stitchworks-jackie
'Spilling Over' detail. a photo by stitchworks-jackie on Flickr.
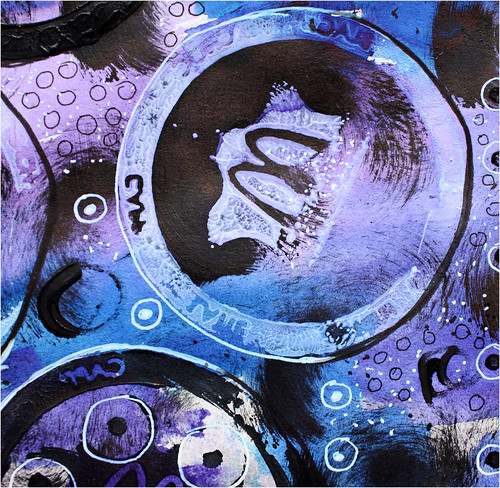
Printing with my coffee cup lid using gesso.

Thursday, March 10, 2011

DBO's Big Lake Swim

Swimming the length of Lake Windermere, in The Lake District, in September, you guessed right again,not me.
I will be cheering on the family team, one swimmer and two rowers.
You can sponsor the team in aid of the Macmillan Cancer charity by clicking on this
link; I will also put a link in my sidebar.

I'm not allowed in the boat because,apparently, I would be too soft and let him give up too easily.

Monday, March 07, 2011

'Spilling Over' Sketchbook Challenge


'Spilling Over' Sketchbook Challenge

A few of the saved bits and pieces I will use one day, from cereal bags, brown paper to washing machine hose. Its all spilling over.

Monday, February 28, 2011

More birds.


I started the week by working on the bird sketchbook, I’ve been a bit distracted since, but at least I have done something for this year’s theme. A year goes so quickly, and last year I sort of stopped and never really got into it again.


I have done some brief sketches of birds illustrated in the book 'African Textiles' by John Gillow.
For anyone near enough there will be an exhibition of bags (last year’s project) in various styles made by ‘Material Girls’ in the library Tadley (Hampshire). The exhibition will be put up today, Monday, so look out for it. There are some very well made and nicely stitched bags, so do take a look if you are local.


I did some monoprinting; one of my current favourite things using water based printing inks.


This one is pretty rough but fun, done on the back of a used envelope.


I also made a cover for my sketchbook; this bird was drawn with Derwent Ink Tense crayons on cotton and then covered with fabric medium. I then washed it to remove some of the plasticy feel of the medium, which took away some of the colour and gave a nice fresco like look. As it is not going to be washed I suppose, thinking about it, I could have just used water to bring out the colours

Christine has asked about Egyptian applique, sorry I can't get back to you, but hopefully you will see this. P150 in John Gillow's book he has a whole illustrated section on this style of applique, which apparently used to all be made in the Street of the Tent-makers.It seems to have mainly been turned hem work using figurative, geometric or calligrphic motifs. I'm sure you would find some examples on the net.

Saturday, February 19, 2011

Wax and Rust


There used to be four guinea fowl in the garden where I work. From a distance they are a very cute and characterful bird, following each other in line like hunched backed old men. Closer up they are really strange, wearing what looks like white masks. Now there are only two and at times they seem to be quite viscous to each other. Their black and white spotted feathers are beautifully patterned.

A group that I belong to have the theme of ‘birds’ this year and are working towards a group display of some kind. Now I have quite a phobia towards anything which flutters, but I have braced myself to collect a few feathers and am making an effort to accommodate the idea of our feathered friends as a theme.


This is a combination of rusted paper, with some branding with a wood burning tool and wax. I have bought some dharma crystals and following instructions on You Tube have made my own encaustic medium. The only difficult bit was straining the black bits out of the dharma. I found that only a very thin layer of material is needed for the filter otherwise the wax cools quickly and and seals the filter. I am using an Batik beeswax, which is actualy much yellower than the pictures show. I like the yellow tinge, but I know that I probably should use refined beeswax. I will not be adding pigment so perhaps it doesn't matter.

If you want to have a go here is the link to the video. I left my wax in the wax pot rather than making little ‘cakes’ as it is the only way I can melt the wax at the moment. I painted on the wax with a brush and then ironed it flattish. Making the medium is quite a smelly process, so you need to have good ventilation in case of fumes. Also stir the beeswax and dharma well; otherwise it tends to congeal at the bottom of the pot.


The January session of my course consisted of making a lino cut having made a pattern from a randomly selected postcard. The results were limited but I made a couple of birthday cards for my sons and a sort of pouch bag from the material I printed on the day. I can’t say I that I felt satisfied by the day, and didn’t feel I learned much or came away with any new ideas or inspiration. Perhaps it was just down to my mood?


Its just occured to me that the bird may swallow the spider; I hope not, I feel quite protective of my new pet.

Wednesday, February 09, 2011

Nearly finished, Persian Palaces.


I’ve been doing little bits of stitching each day on the hanging. One day last week I had a burst of energy and decided that I had done enough and it was time to tackle the backing and binding. It went well using 505 spray which is one of my favourite products to attach the layers before adding the binding. For both the binding and the hanging sleeve I referred to a CD which came with one of my copies of ‘thr3fold journal’. on which Linda Kemshall demonstrates how to do these finishes, which it is easy to forget when you don’t do it very often.


I have read Design Matters monthly newsletter regularly for a long time, and have a copy of their book ‘The Painted Quilt’. I haven’t succumbed to their TV show on-line, but that may happen one day. So for their help with this project I will make them both my blog heroes for February.


It is not quite finished yet, a few more stitches needed on the hanging sleeve, and we have agreed some kind of dangles on the bottom edge, what these will be I have yet to decide, washers or beads??


Welcome to people who have recently started to follow the blog, I try to get back to people to say  'hello' but that's not always possible.
      By the way I hope you are not frightened of spiders!

Saturday, February 05, 2011

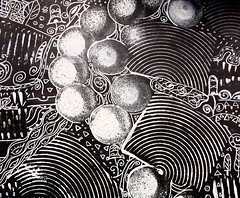
'Black and White' detail.

For the February Sketchbook Challenge 'Opposites'.
Geometric with a hint of Klimt pattern.
Black and white gesso,and a white gel pen.

Friday, January 28, 2011

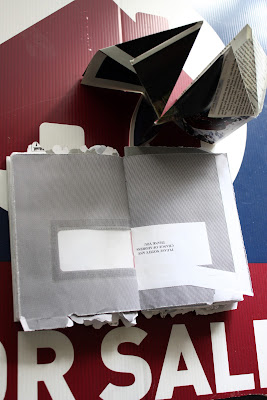
What do you do with your envelopes? Part Two.


This was just a whim and a distraction, an enjoyable one. I have made a book with old envelopes before, where it is I do not know; perhaps I gave it away, who knows?

 The trigger for this little book came from the work of an Australian book artist Adele Outteridge. There is a good video of her talking about her books made of recycled materials on You Tube.

 I made the covers from an old For Sale board and that idea came from the tutor on my medieval book binding course.

 Ever since then I have been looking out for old boards, imagine my frenzied excitement when I saw one at the recycling centre near our local library.  It was a pity that it was attached to a large post with huge rivets. Would that stop me, no way. I went into the library and asked to borrow scissors, and then set about detaching all of the board that I could manage. They probably thought I was crazy and perhaps they were right! The first job was to get out the baby wipes and give the board a good clean.

Today I went to see the exhibition of Alice Kettle's work in the local museum.It is certainly the most impressive show of her work which I have seen. I particularlylike the way she is now combining textiles with ceramics, and painting. The colourswere very strong, particularly with the winter sunshine streaming through the front windows.

Do something interesting with your envelopes and I will link to your work here.
Lin Artiblobs, see her work here.

Monday, January 24, 2011

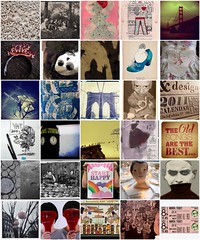
Mosaic Monday


Mosaic Monday
Originally uploaded by Feltbug
Feltbug kindly included my work.Take a look at Flickr to follow links to interesting work chosen by her.

Monday, January 17, 2011

'Persian Palaces' 3


These are some images of the free machining I have done on the Persian Palaces hanging. It is not really quilted but backed with a piece of brushed calico, which is almost like a thin blanket.


I also used my free sample of Dylon in ‘Goldfish Orange’ to dye a piece of cotton poplin for part of the binding. It was so easy, but the colours are more limited than using Procion MX. I love the burst of colour on my wall.

I have a new sewing table bought with Christmas money. Don’t you think it is smart? With the castors taken off it almost aligns perfectly with the computer table I have used as a sewing table for years. I was given sewing table envy by seeing the one Melanie Testa uses; I had no idea I needed or wanted one before seeing hers.


Then I found my blog hero for January  Leah Day. She has wonderful videos of free machine quilting on her blog,from which I sort of got the patterns I have used. Even if you never want to do this, they are so relaxing to watch.

She became a hero when I watched her video in which she advises cutting off part of her darning foot to make seeing what one is sewing easier. It made me laugh and admire her nerve too. The sewing table is advertised on her blog, and I just had to get one after viewing the demonstration numerous times. It really does help to have a nice flat surface.

To Christine who lurks, I appreciate your comment, please keep coming back. I’m so pleased to have any lurkers, it’s the people who download numerous images without a thank you that I feel the urge to get at occasionally.

Tuesday, January 04, 2011

Tutorial

I am taking part in the 2011 Setchbook Challenge;see the badge in the side bar.
Each month there will be a new challenge set by a different artist. Images are
uploaded to Flickr. For January the theme is 'Highly Prized'.
I have been asked for a tutorial on one of the images I added, so here it is.
Bleach discharge as a sketch technique.


Colour you sketchbook page using ink. I applied mine with a piece of sponge.

I used a blue/black drawing ink, but try what you have.


Decide on your subject matter and make a quick sketch.


I cut sponge shapes using the sketch as a rough guide. I have used compressed sponge, which looks like sheets of thin cardboard but when soaked in water expands and has an interesting texture. You can, of course, cut up any cheap sponge.


Next pour out a small amount of bleach. You may like to wear gloves for this part.

Dab the sponge into the bleach and make marks on the coloured page.

As you watch the bleached surface will change colour, in my case from green to white.

Apply the bleach gently. Try not to dribble the bleach and beware of getting it on your clothes, as it will quickly discolour whatever it touches.

Additional marks may be made using a cotton bud.


The next step is get out your pens and work into the sketch outlined with bleach. Try out various pens and see if you can get some interesting results. My white pen resulted in an attractive blue line on the ink. You need to experiment here.


Enjoy.


©Jackie Bowcutt January 2011
Related Posts Plugin for WordPress, Blogger...